| IGES
import - Architectural modelling - Texturing
Part 3
The level of realism of any 3D rendering
is in the texturing. One can get away with
surprising simplicity in geometry and still
create convincing levels of realism. In
the case of buildings, using photographs
for 3D model textures yields the best results.
Taking photographs of real world materials,
scanning them in, and using software such
as Photoshop to make textures "tilable"
is an artform in itself.
RS3D offers a powerful material engine
that gives the modeler many options for
mapping such textures onto objects. Rather
than using the standard 'Parallel mapping'
method for brickwork, we will use a pre-made
scope material that allows us to map our
bricks onto only faces that are within a
certain angle to the mapping object. The
advantage of using this method means we
will not get the mapping "stretching"
through the object. It is only mapped where
we want it:
Load the materials from "Part 3 texturing"
into our scene. (When loading, turn on "materials"
under the 'sections' option). Under the
materials tab, we have 3 new materials:
The level material (in red) is a combination
of the first two materials. But first we
need to assign the brick texture to the
"brick" material. Select 'Brick'
from the textures directory and tile in
X and Y.
Make the view orthographic - side and zoom
the outer wall level. We can map this material
straight to the outer wall itself, or to
the whole Boolean level. In this case we
will map it only to the wall itself, but
to do so, we need to drop it to its own
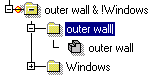
level. Select the 'outer wall & windows'
level and select "Make Current"
from the popup menu. Select the outer wall
object - and select "Drop to Level"
from popup again. Position the object so
it is above the 'windows' level: Select
the 'outer wall' level. (The new one with
only the outer wall in it)
Parallel map the "Brick Scope"
level material to the view. It does not
matter where you place it or how large you
make it. Select the resultant mapping object
- and under the "Spec" tab change
its width, height and depth values to 470.
Make the outer wall level the current level.
In a top view, Duplicate the mapped material
and rotate it 90 degrees about the Y axis
(Green rotate handle).
Make sure you select the "Root"
directory as the current level when your
done. We have now mapped the brick material
through the wall object - but only on the
front and side views.
Select the 'Garden Paving' level. Create
a new VSL material called "Paving".
Add a 'Texture map' wizard, select "pavers.jpg".
Map parallel in plan - change the size of
the mapping to 500mm square.
The scene can be further detailed to include
glass, decking timbers, window sills, deck
framing, plants, interior lights etc. With
any architectural project, it is important
to keep all modeling tasks to a minimum
and only model what you need to see.
Window sills can be modeled by copying
the window CUTS and scaling and sizing,
and cutting them out again.
Adding cameras and animating walkthroughs,
slow pans and the like are all easy to create
once we have our basic model. To add realism
to the model, adding tile textures, grass
texture and bumps to the paving and bricks
would all serve to create a convincing model.
Foliage can be created by using clip maps,
cutting out a simple rectangle with a solid
color or alpha channel serves to keep geometry
at a minimum and realism high. This also
works well to insert people into your models
(clip maps).
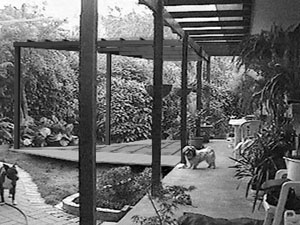
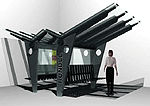
Final Pergola model inserted into photograph
Since we have created this model accurately,
we can even use photographs from on-site
and match the perspective and composite
the two together. Adding foliage in the
foreground and giving the image a natural
"grain" or "blur" helps
to integrate our renders into a photograph.
Another powerful feature of RS3D is the
ability to cut Booleans RIGHT THROUGH OUR
ENTIRE SCENE - simply create an analytical
cube, large enough to encompass the whole
scene, and Boolean NOT the 'site' level
with the cube. By changing the color of
the cube, we can render a red line showing
the section cut, and even animate the cut
right through the site!
The final scene can be found under - Part
3 - finished.
IGES importing
tips
|